PRODUCTOS
ari.Tech-CanScann
3D scanning and automatic measuring of cans.
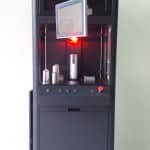
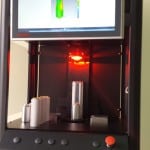
Ari.Tech-CanScann aims to provide a full automatic can scanning and measuring control. The device provides highly accurate 3D scanning and above control vision on the can, along with specifically developed software that allows full automatic dimensional control of cans.
Fast and accurate.
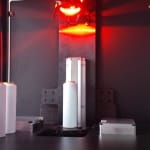
The station scans the can and takes its above view. After it automatically constructs the 3D model of the perimeter of the can.
Visible dimensions from a above view:
- Maximum curl ID
- Mínimum curl ID
- Máximum curl OD
- Mínimum curl ID
Visibible dimensions from side view with axial and rotating movement:
Dimensions checked from a side view of the can
- Total length.
- Contact height.
- Curl length
- Gorge height
- Any dimensión from a side view of the can
Gorge specs
- Gorge height
- Gorge OD
- Gorge ID
Shape and shoulder specs
- Starting point height
- Shape length (full shape comparation)
- Inside diameter
Thread specs
- OD from external thread
- ID from inside thread
- Chimenea height
- Thead specs in general
- Altura de la entrada de la rosca.
Applications
More measurement
Embossed cans
- Height of embossing.
- Depth of embossing.
Measures from the bottom
- Bottom depth height
Individual measurements
- Contact height. Height of opening lip from and inside reference
Applications
- Dimensional control
- Reverse Engineering. Obtaining 3D.
- Calculation of wear and volumes.
- Comparison with theoretical 3D.
- Traceability
- 3D of other solid measurement: Bottles, Tooling, punch, any solid in general.
- Automatic 3D composition of any solid complex composed of different pieces
Operation
Ari.Tech can-scann station provides high-speed scanning.
Process:
- The can is identified in the HMI.
- It is automatically singled out in the database and presets measurements to be made to the can are determined.
- Can is scanned and a full 3D model is reconstructed.
- Full dimensional report on the aforementioned can is provided, including full-colour 3D wear assessment.
Advantage
Measurement of the parameters IMPOSSIBLE to be measured with old traditional techniques:
- Wear with 3D colored map.
- Measurement of any shape concentric or non concentric with accuracy and comparation with drawing.
- Diameters in ALL the perimeter not only on the edge.
OBJETIVE. It is not linked to worker’s expertise.
PRECISO. Hablamos de un error del 0,1%. 1cc en una botella de 1000cc
TRACEABILITY. Due to data measurements historic we know its evolution and its lifetime.
Features
- Accuracy: 0,015mm
- Speed: Scanned, procurement of 3D of a complete can and issue of an automatic measurement report.
- The 3D can be exported into extended formats: 3DS, STL, OOGL, PLY, OBJ, LWO, CRP, WRP, DXF, VRML, IV
- Possibility to import CAD from the following formats: IGES, VDA, Neutral, Parasolid, SolidWorks, Catia, NX, SAT Pro / Engineer, PRT, STEP 203/214.
Automation
So that it could be made in a fully automated way the scanned and automatic measurement of other parameters, different from the current product capability and the automatic issue of the report with results analysis and interpretation.


